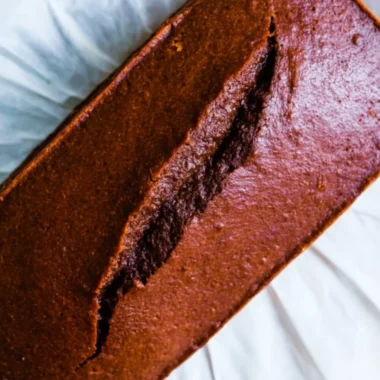

The Cozy Delight of Christmas Tree Cream Cheese Danish
As the winter chill sets in and twinkling lights adorn the neighborhood, there’s nothing quite as comforting as curling up with a warm treat that fills your kitchen with rich scents of sweetness. Today, I’m excited to share a recipe that has become a staple in my home during the holiday season: Christmas Tree Cream Cheese Danish! This delightful pastry is not only visually stunning—shaped like a festive tree—but it also offers a heavenly combination of buttery, flaky dough and a creamy, dreamy filling. Each bite is like a warm hug on a cold day, and it’s perfect for your holiday gatherings or a cozy weekend brunch.
I fondly remember the first time I made this recipe, inspired by a chilly afternoon spent at my grandmother’s house, where the smell of baked goods wafted through the air. She always found a way to turn simple ingredients into delectable memories, and this recipe honors that spirit. Whether you’re a seasoned baker or a newbie, you’ll love how easy it is to whip this up—making it a wonderful addition to your holiday table and a recipe you’ll surely want to pin for later!
Why You’ll Love This Recipe
- Quick & Easy: Using store-bought crescent rolls makes this a breezy holiday treat that comes together in no time.
- Family-Friendly: The delightful shape and sweet flavors make it fun for kids and adults alike, perfect for festive family gatherings.
- Crowd-Pleasing: This Christmas Tree Cream Cheese Danish is sure to impress your guests, leaving them reaching for seconds.
- Customizable: With endless variations (think different fillings or toppings), you can create a unique pastry for every occasion.
- Comforting & Cozy: The combination of warm, creamy filling and flaky dough evokes the heartwarming spirit of the holidays in every bite.
Ingredients You’ll Need for Christmas Tree Cream Cheese Danish
Gather these simple ingredients to get started:
- 1 package crescent rolls
- 1 cup cherry pie filling
- 8 oz cream cheese, softened
- 1/4 cup powdered sugar
- 1 tsp vanilla extract
- 1 egg (for egg wash)
- Sprinkles (for decoration, optional)
How to Make Christmas Tree Cream Cheese Danish
Let’s make it together! Follow these simple steps for a delightful holiday treat:
- Preheat your oven to 375°F (190°C).
- In a mixing bowl, combine the softened cream cheese, powdered sugar, and vanilla extract. Mix until silky smooth and creamy.
- Unroll the crescent rolls on a baking sheet and shape them into a Christmas tree. Pinch the seams together to create a cohesive triangle.
- Spread the creamy mixture evenly over the dough, reaching all the way to the edges.
- Spoon the cherry pie filling generously on top of the cream cheese layer.
- Fold the edges of the dough over the filling, shaping it like a tree—be creative!
- In a small bowl, whisk the egg and brush it over the dough to give your Danish a beautiful golden finish.
- Bake in the preheated oven for 15-20 minutes or until golden brown and lovely.
- Let cool slightly before adding sprinkles for that extra festive touch.
- Serve warm and enjoy the cozy holiday vibes!
Fun Ways to Customize It
While the classic cherry filling is delightful, consider these fun variations to make your Christmas Tree Cream Cheese Danish even more special:
- Berry Bliss: Swap out the cherry pie filling for blueberry or raspberry for a zesty, tangy twist.
- Chocolate Delight: Incorporate mini chocolate chips into the cream cheese mixture for an indulgent, rich flavor that chocolate lovers will adore.
- Nutty Indulgence: Add crushed pecans or walnuts to the cream cheese layer for a delightful crunch.
- Cinnamon Swirl: Mix in a touch of cinnamon with the cream cheese and sprinkle some cinnamon sugar on top before baking for a warm spice embrace.
Chef Emma’s Helpful Tips
To ensure your Christmas Tree Cream Cheese Danish is perfect every time, keep these tips in mind:
- Make Ahead: Prepare the cream cheese mixture and shape the dough the night before, storing it in the refrigerator until you’re ready to bake.
- Ingredient Swaps: Feel free to replace the cherry filling with your favorite fruit preserves or even apple pie filling for a different take!
- Slicing Trick: To serve, slice the tree into individual pieces for a beautiful presentation and easy serving.
- Storage Suggestions: Store any leftovers (if there are any!) in an airtight container in the fridge for up to three days. Reheat in the oven for a few minutes to regain that fresh-from-the-oven taste.
What’s Inside – Nutrition Breakdown
Each serving of this delightful Christmas Tree Cream Cheese Danish contains approximately:
- Serving Size: 1 slice
- Calories: 250
- Carbohydrates: 30g
- Sugar: 9g
- Fat: 12g
- Protein: 4g
- Sodium: 300mg
Frequently Asked Questions
Here are some common questions about the Christmas Tree Cream Cheese Danish:
- Can I make this ahead? Yes! Prepare the cream cheese mixture ahead of time and assemble the Danish, then bake it just before serving.
- Can I use different ingredients? Absolutely! Feel free to experiment with different fillings and flavorings to suit your taste preferences.
- How do I store leftovers? Keep any leftover Danish in an airtight container in the refrigerator for up to three days.
- How long does it last? For best quality, enjoy the Danish within three days of baking.
A Cozy Closing Note
As the season of giving approaches, this Christmas Tree Cream Cheese Danish will surely bring joy to your home and delight to your taste buds. Whether you’re serving it at a holiday brunch or enjoying it by the fire with a cozy cup of cocoa, it embodies the spirit of warmth and togetherness. Don’t forget to save this recipe to your holiday board for when you need a sweet and comforting treat! Happy baking, and may your holidays be filled with delicious memories!

Christmas Tree Cream Cheese Danish
- Total Time: 35 minutes
- Yield: 8 servings 1x
- Diet: Vegetarian
Description
A visually stunning holiday pastry shaped like a Christmas tree, featuring a creamy filling and cherry pie topping.
Ingredients
- 1 package crescent rolls
- 1 cup cherry pie filling
- 8 oz cream cheese, softened
- 1/4 cup powdered sugar
- 1 tsp vanilla extract
- 1 egg (for egg wash)
- Sprinkles (for decoration, optional)
Instructions
- Preheat your oven to 375°F (190°C).
- Combine the softened cream cheese, powdered sugar, and vanilla extract. Mix until silky smooth and creamy.
- Unroll the crescent rolls on a baking sheet and shape them into a Christmas tree. Pinch the seams together to create a cohesive triangle.
- Spread the creamy mixture evenly over the dough, reaching all the way to the edges.
- Spoon the cherry pie filling generously on top of the cream cheese layer.
- Fold the edges of the dough over the filling, shaping it like a tree—be creative!
- Whisk the egg in a small bowl and brush it over the dough to give your Danish a beautiful golden finish.
- Bake in the preheated oven for 15-20 minutes or until golden brown and lovely.
- Let cool slightly before adding sprinkles for that extra festive touch.
- Serve warm and enjoy the cozy holiday vibes!
Notes
Feel free to customize the filling with your favorite fruits or add chocolate chips for a richer taste.
- Prep Time: 15 minutes
- Cook Time: 20 minutes
- Category: Dessert
- Method: Baking
- Cuisine: American
Nutrition
- Serving Size: 1 slice
- Calories: 250
- Sugar: 9g
- Sodium: 300mg
- Fat: 12g
- Saturated Fat: 7g
- Unsaturated Fat: 3g
- Trans Fat: 0g
- Carbohydrates: 30g
- Fiber: 1g
- Protein: 4g
- Cholesterol: 30mg